How to Care for New Sod: Day-by-Day Watering, Mowing & Rooting Guide
A condition-based aftercare framework grounded in university turfgrass extension research. Discover why rigid timer schedules destroy new lawns, how to master the gentle tug test, and the exact biological cues that signal when it is safe to mow and walk on newly laid turf.
The 60-Second Rule for New Sod Care
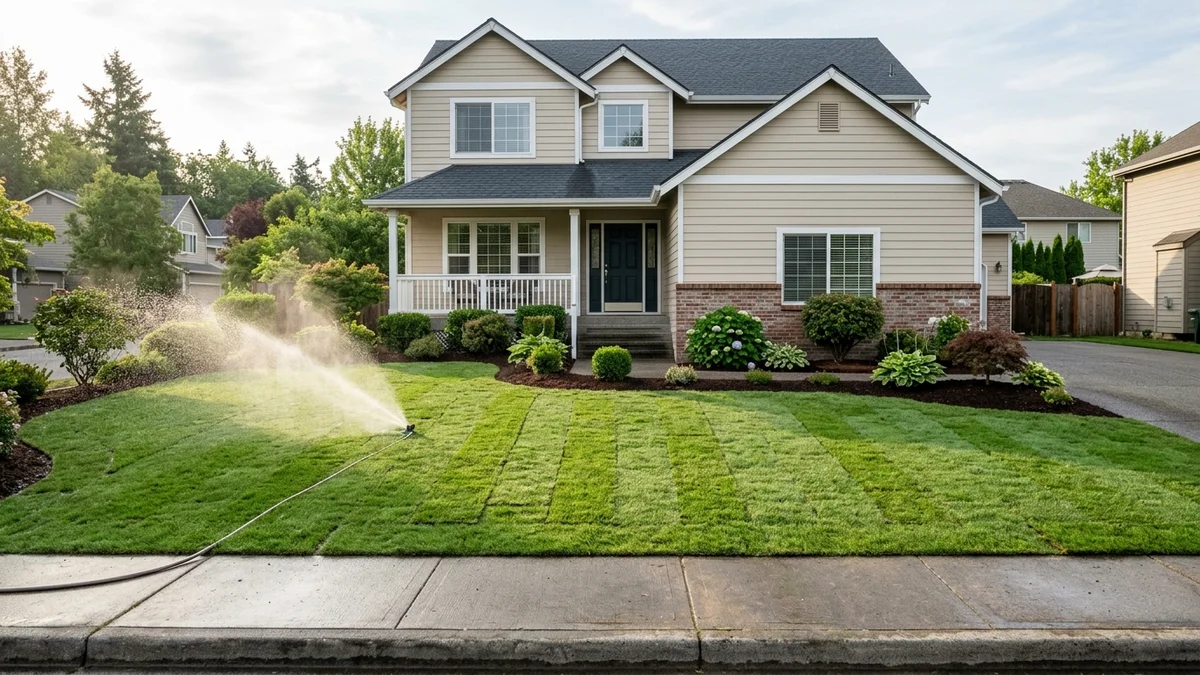
Successful new sod care depends on conditions over calendars: you must keep both the sod thatch and the top 2–3 inches of subsoil damp like a wrung-out kitchen sponge, without creating waterlogged, oxygen-starved mud. During Days 1–3, water 2 to 3 times daily in short cycles (8–15 minutes) to bond seams. During Days 4–9, reduce to 1 to 2 cycles daily as early root hairs emerge. Around Days 10–14, perform the gentle tug test; once sod snags with Velcro-like resistance, wean down to once daily.
Never mow until the sod is firmly anchored and grass reaches 3.5 to 4 inches (typically Days 14–21). When mowing, follow the 1/3 rule using a lightweight walk-behind mower with sharp blades. Keep foot traffic at zero for the first 10–14 days, and wait at least 3 to 4 mowings before applying any weed killer or broadleaf herbicide.
New Sod Care at a Glance: Phase-by-Phase Timeline
| Phase & Days | Watering Cadence & Depth | Tug Test / Root Status | Mowing & Traffic Policy | Chemical Safety |
|---|---|---|---|---|
| Phase 1 Days 1 – 3 | 2–3x daily (8–15 min/zone). Keep top 2–3" soil moist. Never let seams dry. | Unanchored. Rolls lift cleanly with zero resistance. | DO NOT MOW. Zero foot traffic. Stay off completely. | NO herbicides. Rely only on pre-plant starter fertilizer. |
| Phase 2 Days 4 – 9 | 1–2x daily (morning & midday syringe). Damp sponge texture 3–4" deep. | Early root hairs stretching. Light initial tack-down. | DO NOT MOW. Emergency inspection steps only. | NO weed killers. Hand-pull opportunistic seedlings gently. |
| Phase 3 Days 10 – 14 | 1x daily, early morning soak. Encourage roots to chase moisture 4–5" down. | "Velcro" resistance. Noticeable snagging on tug test. | Pre-mow evaluation. Dry turf 24h prior if ready to cut. | Hold off on fertilizer. Root growth takes priority over blade push. |
| Phase 4 Days 15 – 21 | Every other day (3–4x weekly). Let surface breathe between runs. | Firmly anchored. Blades stretch/tear before sod lifts. | FIRST MOW PERMITTED. Walk-behind mower only. 1/3 rule. | Still NO herbicides. Sensitive new roots absorb toxins easily. |
| Phase 5 Days 22 – 30 | 2–3x weekly, deep soak (0.4–0.5" per run; ~1.25" total/wk). | Seams fully fused. Deep subsoil penetration (4–6"). | Routine mowing every 5–7 days. Normal light foot traffic. | Apply mild slow-release balanced fertilizer around Day 30. |
| Phase 6 Days 31+ | 1–2x weekly deep soak (1.0–1.5" total weekly including rain). | Mature lawn root architecture. | Full lawn activities, pets, sports, and patio furniture. | Selective herbicides safe after 4th full mowing. |
*Note: Shorter root development occurs with fast-rooting species (Tall Fescue, Bermudagrass); longer timelines apply to slow rooters like Kentucky Bluegrass or during cool autumn weather.
Interactive New Sod Care Diagnostic Tracker
Select your sod’s installation age, turf variety, current weather, and tug-test anchor status to generate a tailored watering, mowing, traffic, and weed control protocol.
Initial Wetting & Seam Knitting
MOWING NOT PERMITTED: The sod is unanchored (loose). The mower wheels and suction will pull sod strips upward, destroying tender root contacts.
Zero foot traffic. Stay off completely. Keep children and pets off lawn.
Agronomic Warning for Current Conditions:
Standard moderate conditions (65°F – 80°F). Ideal establishment temperature for root cell division.
Golden Rule: Never let the sod dry out. Edges shrink and curl within 2 hours of direct sun if neglected.
The Golden Rule of Watering: Conditions Over Calendars
When homeowners search for sod care advice, the most ubiquitous recommendation is a rigid formula: "Water 20 minutes in the morning and 20 minutes in the afternoon." In the real world of turfgrass hydrology, that advice is virtually meaningless—and frequently fatal to young sod.
Different irrigation heads emit water at dramatically disparate precipitation rates. A standard fixed spray pop-up head applies between 1.4 and 1.8 inches of water per hour. In contrast, a gear-driven rotary head or multi-stream rotary nozzle applies only 0.4 to 0.6 inches per hour—nearly one-third the volume. If a homeowner with fixed spray heads runs their system for 20 minutes twice a day, they are dumping over 1.1 inches of water onto their lawn daily, turning the topsoil into an anaerobic swamp. If a homeowner with rotary heads runs for 10 minutes, their sod receives a meager 0.08 inches, causing catastrophic drying within hours.
Why "Water for 20 Minutes" Destroys New Sod
The most widespread lawn care myth online is giving a universal timer recommendation. Because different sprinkler heads apply water at drastically different rates, a "20-minute" cycle either severely starves or completely drowns your lawn depending on your hardware.
Fixed Spray Heads (Pop-ups)
Emits a fan of water continuously across a fixed radius (8–15 feet). Delivers water very rapidly.
The 15-Minute "Catch-Can / Tuna Can" Audit
Don't guess how much water your lawn is getting. University Extension services recommend this simple household test to calibrate your exact minutes to inches ratio:
Place 4 to 6 empty tuna cans or cat food cans (straight-sided, flat bottom) randomly across the sod zone, ensuring one is placed near a hot driveway or sidewalk edge.
Turn on the sprinkler zone for exactly 15 minutes. Ensure all heads pop up completely and rotate through their full sweep without obstructions.
Use a small ruler to measure water depth in each can in fractions of an inch. Multiply the average by 4 to determine your system's exact hourly precipitation rate.
The Hardscape Heat Island Vulnerability
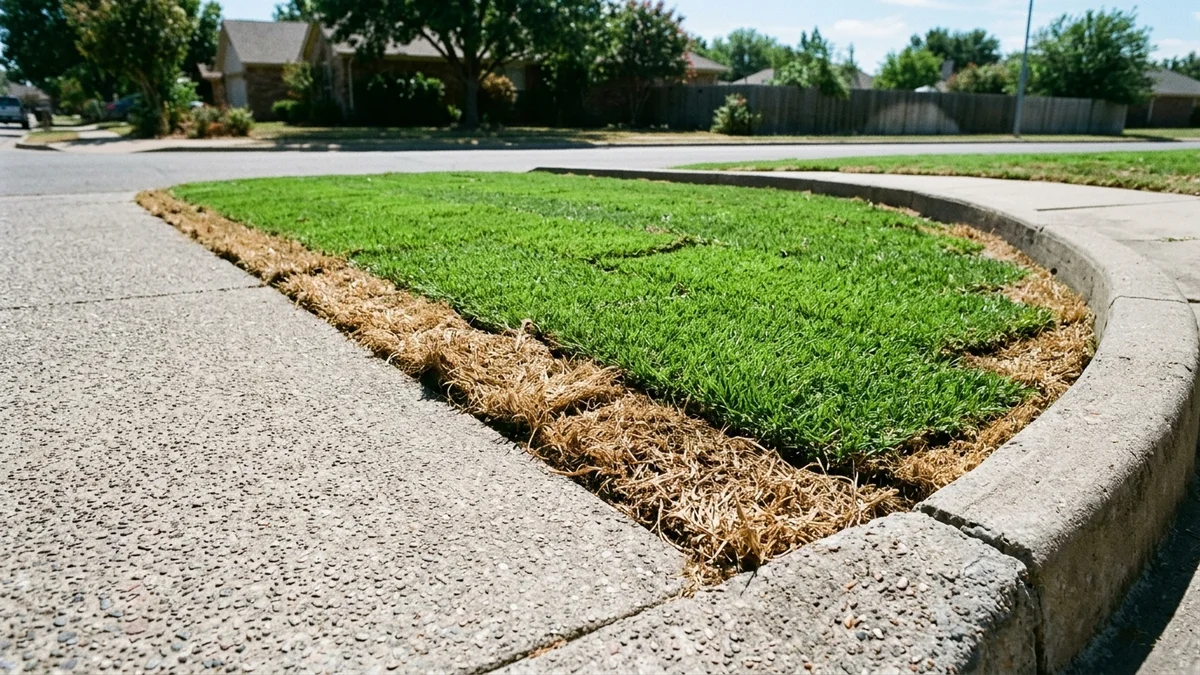
Take a close look at the perimeter of newly installed sod. Notice where the grass turns yellow and curled first: along asphalt driveways, concrete walkways, and stone curbs.
Dense hardscape materials act as massive heat sinks. While ambient air may be 78°F, driveway surfaces easily reach 125°F to 140°F in direct sunlight. This radiant heat wicks moisture out of adjacent sod edges three times faster than interior turf. Furthermore, wind turbulence along open sidewalks accelerates evapotranspiration (ET).
The Best Time of Day to Water New Sod
Lowest wind speeds, zero solar evaporation loss, and maximum water infiltration into the root zone before daytime heat begins.
Only on high-heat days (>85°F). A brief 5-minute mist cools the turf canopy and prevents wilt without soaking the soil to mud.
Watering late leaves wet foliage overnight in warm temperatures—the primary trigger for lethal Pythium blight and fungal rot.
Moist vs. Soggy: The Soil Aeration Imperative
Grass roots do not live in solid dirt; they live in the microscopic pore spaces between soil particles. In healthy soil, roughly 50% of these pore spaces are filled with water, and 50% are filled with oxygen.
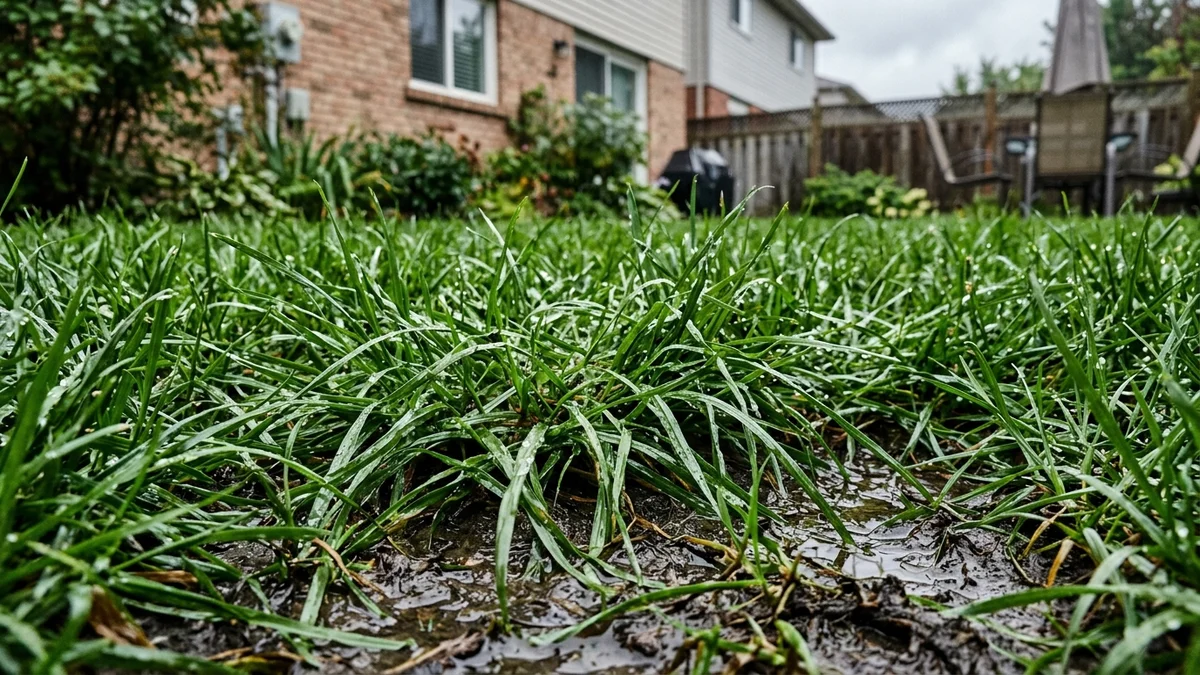
When you overwater new sod, liquid water completely fills all pore spaces, driving out every trace of dissolved oxygen. Root respiration shuts down. Deprived of oxygen, root cells can neither absorb nutrients nor divide to produce new hair roots. Within 48 to 72 hours of waterlogging, root tissues rot, turn black or brown, and emit a sour hydrogen sulfide smell. The unanchored sod sits loosely on top of mud, turning yellow and dying despite being surrounded by water.
Moist vs. Soggy: The Sub-Sod Soil Moisture Spectrum
The number one mistake homeowners make is assuming that more water is always better. New sod requires aerated moisture, not stagnant mud. Compare the three conditions below to diagnose your lawn.
Moist (Optimal Balance)
The University Extension Gold Standard
Canopy & Visual Turf Signs
- •Lush, vibrant green blades standing erect
- •Tight, knitted seams with zero visible separation or gap lines
- •Uniform moisture across both center turf and perimeter borders
- •Active healthy vegetative growth without excessive succulent yellowing
Sub-Sod Soil Feel Test
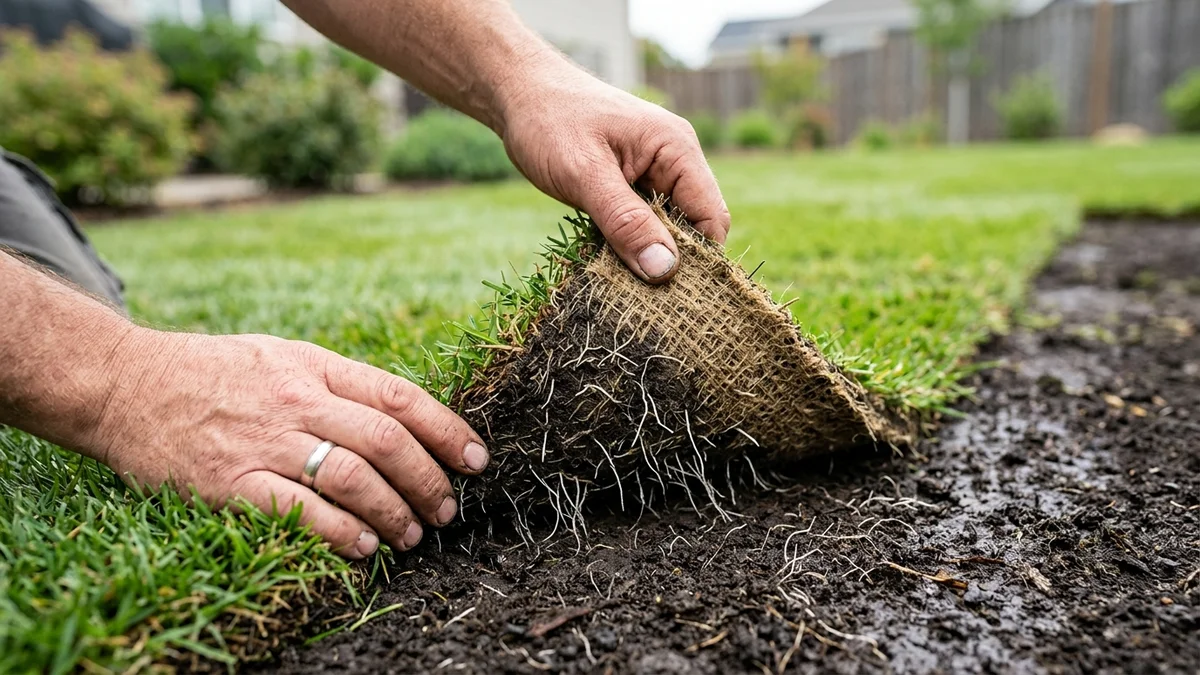
Dark, cool, evenly damp soil 3 to 4 inches beneath the sod roll. Soil holds together when squeezed but produces zero dripping water (like a wrung-out kitchen sponge).
The Footprint / Shoe Test
Turf feels firm underfoot. Grass blades immediately spring back upright when stepped on. No squishing or water pooling around shoe soles.
Root Impact & Soil Biology:
High capillary oxygen combined with steady hydration stimulates rapid elongation of fibrous white hair roots that securely knit into native soil within 10–14 days.
Corrective Agronomic Action:
Maintain current protocol. As the lawn approaches Day 10–14, gradually reduce frequency while increasing water run duration to train roots deeper.
The 6-Inch Screwdriver Moisture Test
Don’t rely on how green the grass looks on the surface. Take a standard 6-inch flathead screwdriver and push it straight down through the sod into the soil below:
- Slides in smoothly with moderate resistance (down to 4–5 inches): Perfect moisture. Soil capillaries are hydrated.
- Pushes in with zero effort, bubbling water or feeling like jelly: Overwatered / waterlogged. Shut off water immediately.
- Hits a hard brick wall at 1 or 2 inches: Under-watered. The subsoil is dry and refusing root elongation. Increase soak time.
How & When to Test Rooting: The Gentle Tug Test
When sod is harvested from the turf farm, a mechanized harvester slices through the root mass 1/2 to 3/4 of an inch below the crown, severing roughly 80% to 90% of the turf’s active root system.
When laid on your prepared subsoil, the surviving root nodes and rhizomes begin generating fine, white adventitious root hairs. These hairs must physically bridge the boundary layer between the sod's native peat or sandy loam backing and your property's subsoil.
The speed of this root anchorage varies dramatically by turf species and soil temperature:
- Kentucky Bluegrass: 12 to 21 days (slow, rhizomatous establishment)
- Turf-Type Tall Fescue: 8 to 14 days (aggressive, deep taproot behavior)
- Perennial Ryegrass: 7 to 12 days (rapid fibrous root regeneration)
- Bermudagrass: 7 to 10 days in 80°F+ weather (extremely aggressive stolons)
- Zoysiagrass: 10 to 16 days (dense stoloniferous knitting)
- St. Augustinegrass: 10 to 14 days (stolon-driven anchoring)
How to Perform the Gentle Tug Test
The gentle tug test is the standard agronomic method recommended by university turfgrass extension services to evaluate whether new sod has established deep root anchoring before introducing foot traffic or lawn mowers.
The 3-Step Testing Procedure
Select 3 Test Locations Across the Lawn
Choose 2 to 3 interior sod rolls located away from concrete driveways, shade trees, and property edges. Edges near hot curbs dry out faster, while low swales stay soggy. Interior rolls give you an accurate baseline.
Grip a Small Cluster of Grass Blades
Kneel on a piece of plywood or kneeling pad (to distribute your weight evenly). Gently gather a small handful of grass blades (about 10–15 blades) near the center of a sod piece between your thumb and forefingers.
Apply 2 to 3 Pounds of Gentle Upward Pull
Pull upward slowly with light, steady force—roughly the effort required to lift a half-gallon jug of milk. Notice the degree of resistance felt in your fingertips.
What Did You Feel When You Pulled?
Click your tactile sensation below to see the biological status and your next actionable step:
Noticeable "Velcro" Snagging Resistance
Hundreds of tender white root hairs have penetrated 1/2 to 1 inch into the native ground. They hold the turf loosely, like two strips of hook-and-loop fastener.
Wean from multiple daily waterings to once daily. This forces roots deeper. If grass height exceeds 3.5 inches, let soil dry for 24 hours and prepare for an ultra-gentle first mow.
First Mowing Protocol: Height, Blades & The 1/3 Rule
The Pre-Mowing 5-Point Safety Checklist
Never start your lawn mower until you have verified every single one of these criteria:
- Passed the Tug Test: Sod cannot be lifted by hand in at least 3 distinct lawn areas.
- Firm, Dry Soil: Irrigation withheld for 24–36 hours prior to mowing so wheels don’t rut the turf.
- Height Exceeds 3.5 Inches: Grass has achieved sufficient leaf canopy to sacrifice 1/3 height.
- Razor-Sharp Mower Blade: Dull blades tear leaf cell walls, turning tips brown and inviting fungus.
- Lightweight Walk-Behind: NEVER use heavy riding or commercial zero-turn mowers for the first 6 weeks.
University Extension Mowing Heights by Species
| Turf Species | Turf Class | First Mow Target Height | Mature Regular Height | Mowing Cadence |
|---|---|---|---|---|
| Kentucky Bluegrass | Cool-Season | 3.0 – 3.5 inches | 2.5 – 3.5 inches | Every 5–7 days |
| Turf-Type Tall Fescue | Cool-Season | 3.5 – 4.0 inches | 3.0 – 4.0 inches | Every 5–7 days |
| Perennial Ryegrass | Cool-Season | 2.5 – 3.0 inches | 2.0 – 3.0 inches | Every 4–6 days |
| Bermudagrass (Hybrid) | Warm-Season | 1.5 – 2.0 inches | 1.0 – 1.5 inches | Every 3–5 days in summer |
| Zoysiagrass | Warm-Season | 2.0 – 2.5 inches | 1.5 – 2.5 inches | Every 5–7 days |
| St. Augustinegrass | Warm-Season | 3.5 – 4.0 inches | 3.0 – 4.0 inches | Every 5–7 days |
The Agronomic 1/3 Rule: Why Scalping Stalls Root Growth
Turfgrass scientists have proven that when you remove more than one-third of the total leaf blade height in a single mowing, root elongation instantly ceases.
The grass plant goes into survival shock, shifting all carbohydrate reserves away from root development to emergency leaf foliage regeneration. If your newly laid sod was 4.5 inches tall and you cut it down to 2 inches, you remove over 55% of the leaf surface, starving the unanchored root system right when it needs energy to knit into the subsoil. If your lawn gets overgrown before your first mow, raise your mower deck to its absolute highest notch for the first pass, wait 3 days, and then make a second pass at your target height.
Fertilizer & Weed Control: What NOT to Do
Do not apply any selective post-emergent broadleaf herbicide (such as 2,4-D, dicamba, or triclopyr) or pre-emergent crabgrass preventer until the new sod has been mowed at least 3 to 4 times.
Why herbicides kill new sod: Herbicides work by interrupting plant cell division. Tender root tips and juvenile crowns cannot differentiate herbicide chemistry from soil nutrients, leading to stunted root development, leaf bleaching, and widespread patch mortality.
How to handle early weeds: In the first 60 days, hand-pull visible broadleaf weeds (like dandelion, clover, or crabgrass seedlings) gently after a watering session when the soil is loose.
If a quality starter fertilizer (rich in phosphorus and potassium) was tilled into the soil prior to laying the sod, do NOT apply additional surface fertilizer for the first 30 days.
Why early nitrogen is dangerous: High doses of fast-release nitrogen stimulate succulent, weak top growth that transpires water rapidly while demanding carbohydrates that the newly severed roots cannot yet support.
Day 30–45 Fertility Target: Once the lawn has been mowed twice and passed the tug test, apply a mild, slow-release balanced fertilizer supplying roughly 0.5 to 0.75 lbs of Nitrogen per 1,000 sq ft.
Dormant Sod Care: Late Autumn & Winter Installations
Laying dormant sod—such as warm-season Bermudagrass in November or cool-season Kentucky Bluegrass just before ground freeze—is a widely practiced commercial landscaping technique. The sod rolls are tan or straw-colored, and plant metabolism is resting.
However, dormant sod still requires moisture. The greatest risk to winter-laid sod is winter desiccation: dry, freezing winter winds wick moisture out of the sod backing, killing the dormant crown before spring green-up.
Apply a heavy soaking immediately upon installation to eliminate subsoil air pockets and bond sod rolls to the soil bed.
If winter brings sunny, dry, windy conditions without snow cover, run irrigation for 15–20 minutes once every 10 to 14 days during the warmest part of the day.
Never water if temperatures are forecast to dip below 32°F within 24 hours. Standing water that freezes around unrooted crowns causes mechanical ice damage.
Diagnosing Common New Sod Problems
| Visual Symptom | Underlying Cause | Diagnostic Verification | Immediate Corrective Action |
|---|---|---|---|
| Seams separating & edges turning straw-yellow | Severe moisture deficit causing sod backing shrinkage. | Sub-sod soil feels dusty/dry; screwdriver cannot penetrate past 1 inch. | Immediately hand-soak all seams and edges with hose nozzle. Press edges down firmly. Increase daily cycle duration. |
| Pale yellowing turf with squishy mud underfoot | Overwatering; anaerobic root suffocation. | Deep shoe ruts; sour marsh smell; black slimy roots under sod roll. | Shut off irrigation for 24–48 hours until soil firms. Allow root zone to oxygenate. Rebalance sprinkler cadence. |
| Mushrooms sprouting across the lawn | Harmless fungal fruiting bodies feeding on moist farm compost. | White or tan toadstools pop up during Days 5–12. Turf beneath remains green. | No chemical treatment needed. Kick them over or mow off. They disappear naturally as watering is weaned. |
| Dark water-soaked patches that collapse rapidly (Pythium Blight) | Fungal blight triggered by night watering and high humidity (>70°F night temps). | Slimy, cottony white mycelium webbing visible in early morning dew. | Stop all evening/night watering immediately. Water only between 5–8 AM. Apply a labeled university-approved turf fungicide drench if severe. |
| Sod lifts cleanly after 14 days with zero root resistance | Improper soil prep (hardpan compaction), overwatering mud, or excessive shade. | Subsoil is either rock-hard compacted clay or constantly flooded sour mud. | If compacted, gently aerate perimeter with pitchfork holes to allow root entry. If muddy, drastically cut water to let soil breathe. In chronic deep shade where sod repeatedly fails, consider converting the zone to shade-adapted lawn alternatives like native Carex sedges. |
Helpful Turf & Soil Planning Calculators
Sod Calculator
Calculate square footage, sod rolls, pallets, and waste allowances for any yard shape.
Grass Seed Calculator
Estimate seed pounds for overseeding, new lawn seeding, and patch repair by species.
Lawn Fertilizer Calculator
Calculate nitrogen application rates, N-P-K ratios, and bag coverage per 1,000 sq ft.
Yard Drainage Solutions
Fix standing water, soggy turf, swales, French drains, and low-spot pooling.
Planning a Sod Project in Greater Boston or North Shore Massachusetts?
While this condition-based aftercare guide applies to lawns across the United States, homeowners located in Peabody, Danvers, Beverly, Salem, and surrounding Massachusetts communities can connect with licensed, vetted local landscaping professionals. Our dispatch team connects you with verified local contractors for site grading, topsoil prep, commercial-grade sod installation, and seasonal turf management.
Answers
Frequently Asked Questions: How to Care for New Sod
01How often should I water new sod?
During Days 1 to 3, water 2 to 3 times daily in short cycles (8 to 15 minutes per zone depending on nozzle precipitation rate) to keep the sod roll and top 2 inches of soil consistently damp. From Days 4 to 9, reduce to 1 to 2 times daily. By Days 10 to 14, once the sod passes the gentle tug test, transition to once daily in the early morning. After Day 21, wean down to 2 to 3 deep waterings per week to train roots deep into the subsoil.
02How do I know if I am overwatering new sod?
Signs of overwatering include a squishy, spongy feel underfoot where shoes leave deep muddy ruts, standing water in seams, a pale yellowish or lime-green color across the turf, and a sour or stagnant swamp odor beneath the sod backing. Overwatered sod fails to root because waterlogged soil starves root cells of essential oxygen, triggering brown root rot and Pythium damping-off.
03When can I walk on new sod?
Keep all foot traffic off the lawn for the first 10 to 14 days. Stepping on soft, saturated, unrooted sod leaves permanent depressions and tears delicate microscopic root hairs emerging from the thatch. Light foot traffic is permitted after Day 10–14 solely for performing the gentle tug test or adjusting sprinklers. Full residential traffic, children, and pets should wait until after the first mow (Days 15–21) when roots are firmly anchored.
04When should I first mow new sod?
Mow for the first time between Days 14 and 21, but ONLY after two conditions are met: (1) the turf passes the gentle tug test with firm resistance across multiple zones, and (2) the grass has grown to roughly 3.5 to 4 inches tall. Withhold irrigation for 24 to 36 hours prior so the soil is firm. Use a lightweight walk-behind mower with razor-sharp blades, set the deck to its highest notch, and never cut more than one-third of the blade height.
05Why are my new sod seams turning yellow or pulling apart?
Shrinking seams and yellowing edges indicate moisture deficit. When sod rolls dry out, the soil backing shrinks horizontally, pulling adjacent rolls apart and leaving 1/2-inch gaps. Perimeter edges along hot asphalt driveways and concrete curbs desiccate even faster due to radiant heat. Immediately hand-soak all separated seams and perimeter edges with a garden hose until the subsoil is thoroughly moist.
06Can you water new sod at night?
No. Never water new sod in the late evening or night (after 4:00 PM). Wet grass blades sitting in warm, stagnant darkness for 10 to 12 hours create the ideal microclimate for catastrophic fungal infections, including Pythium blight, brown patch, and melting out. The best watering window is early morning between 5:00 AM and 8:00 AM, with brief midday syringing permitted only during extreme heat (>85°F).
07When can I put weed killer or weed and feed on new sod?
Wait until you have mowed the lawn at least 3 to 4 times (typically 6 to 8 weeks after installation) before applying any post-emergent or pre-emergent herbicide. New sod roots are exceptionally sensitive to chemical uptake; applying weed killer too early can stunt root cell division, bleach foliage, or kill the entire lawn. Hand-pull visible weeds during the first two months.
08How long does new sod take to root?
Initial root tacking (microscopic white root hairs snagging the subsoil) begins between Days 5 and 9. Noticeable 'Velcro-like' resistance occurs around Days 10 to 14. Deep structural rooting and complete seam fusion into native subsoil typically take 21 to 30 days under optimal moisture and temperature conditions. Cool-season Kentucky Bluegrass takes longer (14–21 days) than fast-rooting Tall Fescue or warm-season Bermudagrass.
09Should I fertilize new sod right away?
No surface fertilizer should be applied immediately after laying sod if a starter fertilizer was incorporated into the topsoil prior to installation. Adding excess nitrogen on top of fresh sod forces rapid leaf growth that outpaces the injured root system's ability to supply water, while fertilizer salts can desiccate tender root tips. Wait 4 to 6 weeks (around Day 30–45) before applying a mild, balanced, slow-release turf fertilizer.
10What do I do if mushrooms start growing in my new sod?
Mushrooms are a normal, harmless byproduct of frequent surface moisture and decaying organic matter in the rich sod farm compost. They will not damage your grass. Simply kick them over, mow over them once mowing begins, or pick them if you have pets. Mushrooms will naturally disappear as you reduce watering frequency and wean the lawn into its deep, infrequent schedule.
Ready to Transform Your Lawn with Fresh Sod?
Speak with our North Shore landscape specialists for transparent estimates on grading, topsoil installation, and fresh premium sod delivery.
Get connected with an independent local landscaping professional. Calls go to (877) 537-6896.